Saturday, April 30, 2011

Baggage Train

The baggage train is done. Caissons, limbers, wagons, ambulances, pack mules, and the Royal Medical Corps.


Saturday, April 23, 2011

Battle of South Bend

15 October: Katzian forces based out of the District of Doft have won a hard fought victory against the forces of teh Barony of Gluppity-Glupp. The Katzian marine and naval forces, reinforced by some second line units, landed at the small village of South Bend and advanced on the Glupp battery blocking movement along the river.

One brigade of gg troops advanced rapidly to meet the Katzian Marines moving along the river. After severl volleys and some close quarters combat, Commadore Nizzond's Privateers charged the enemy to route a battalion. His blood thirsty troops advanced to the stream after taking the battalion's colors and destroying the unit.

Meanwhile, the second Katzain brigade moved to out flank the defenders but were met by redeploying Glupp troops. The Katzain troops slowly squeezed the defenders back towards the redoubt but suffered heavy casualties along the way.

The issue was in doubt until the end [both sides at 0 Morale Points] when the Floobertown Fencibles completed the encirclement of the defenses just as the gg commander fell in a devestating volley delivered by the Guarda de Costa. The Glupp forces broke en mass and threw down their arms.

The exhausted Katzian forces rounded up the prisoners and took charge of the battery. The River Iller was once again open to traffic as Admiral Buxbaum's depleted force sailed West on the 17th. The Northern Alliance could head into winter knowing Merlichetic would hold.

The Katzian landing force consisted of:

Admiral Buxbaum, Lake Winna Bango Squadron
COL Snape (Oif Prov. Marines)
10- Oif Provisional Marine Regiment
11- Lake Winna Bongo Provisional Marine Regiment
48- Nizzonds Volunteer Privateer Regiment

COL Beetle (Flobbertown Fencibles)
12- Provisional Naval Landing Party

47- Gee Hossa Ehat Guarda de Costa Regiment
36- Flobbertown Veteran Fencible Regiment
43- Garbledrum Garrison Regiment

The enemy forces consisted of six battalions of infantry. The guns played no part in the battle.


Village of South Bend on the right.

A mixed bag of troops scrounged for the landing.

The Glupp river battery.

Glupp forces advanced quickly to halt the Marines.

Colonel Beetle leads the flank march.

Nizzond's roudy bunch break the first line.

Halted by fire from the far bank.

The flank attack is met by heavy fire.

The Marines try again.

Slowly squeezing the perimeter.

Glupp troops repeatedly force the attackers back down the hill.

The fatal moment!

Glupp forces surrender en mass.


This is my second battle using the Piquet Field of Battle rules. A few mistakes, but I'll call that fog of war. This battle could have gone against Katzenstein...I was thinking of how that would effect the campaign when I rolled a 1 to kill the enemy commander. a Morale Test then followed and it spelled disaster for the defenders that had caused much heavier casualties to that point.

Wednesday, April 20, 2011

First Step - Clone Army


All who post a comment on this post have earned the Elite ARF Trooper Medal.
--------------------------------------------------------------------------------


My son has started building a Clone Trooper army using Lego minifigs. The first batch are below from the Clone Trooper Battle Pack.
4 Trooper and  Jedi


Bomb Squad Trooper with sniper rifle

BARC Speeder

Wednesday, April 13, 2011

Campaign Continues

4 October: The opposing forces are stalmated around Merlichetic with the Legion regrouping to the West and the Alliance forces improving the defenses around the town. Both are two weak to conduct an attack and must await further developments. BG Van Nuys is recouperating under the care of the buxom daughter of the mayor.

9 October: The rebels in Gwerhof continue to hold off the Hippo-Heimer forces in anticipation of the arrival of Schluppity-Schlupp forces from the North. The Schlupp corps advances slowly concerned about the situation around Merlichetic.

11 October: Katzian forces in the South are massing for a march to help their allies. One division is enroute to lift the seige at Corfu. Maintaining the fort at Corfu will be a thorn in the Poo-Bochen side and pin their forces near the border.

15 October: In an aggressive move, Katzian troops have landed along the Hippo-Heimer river bank and are advancing to remove the gg troops that have been blocking the river. A victory would reopen traffic on teh river and allow reinforcements to flow into Merlichetic.


The forces landed to attack the blockade force consists of:

Admiral Buxbaum, Lake Winna Bango Squadron-


10- Oif Provisional Marine Regiment

11- Lake Winna Bongo Provisional Marine Regiment

12- Provisional Naval Landing Party

47- Gee Hossa Ehat Guarda de Costa Regiment

48- Nizzonds Volunteer Privateer Regiment

36- Flobbertown Veteran Fencible Regiment

43- Garbledrum Garrison Regiment

Sunday, April 10, 2011

1st Flames of War battle

My son and I played our first game of Flames of War using the figures I bought at Historicon 2010 and finished painting in November 2010. We used the same general set up from the imagi-nation game I just finished.

I made this a simple encounter battle with 3 infantry platoons per side.

I drew first blood destroying a Ranger team and damaging my son's morale. I don't go for the kill on him, but I don't let him win all the time either.

We made some mistakes and started to get a good feel for the rules towards the end. I can't say I like the rules very much but they are fairly easy and fast playing...two valauble attributes when initiating a new wargamer.

I think back to my days playing on a sand table with 1/72 plastic figures using homemade rules...I wish I had known more about wargaming back then (I would have loved Charge!) and I would have been in heaven with the Flames of War troops.


Thursday, April 7, 2011

Piquet: Field of Battle notes for Merlichetic

For those interested (or not!) in the Field of Battle rules, you can see my notes below. I kept detailed notes so I could write the AAR and to help learn the game. I foudn where I made several mistakes and where I lost track of cards...fog of war helped by the occasional intervention of a nine year old boy.

This is a long post and those unfamiliar with the rules should not be put off...this kind of record keeping is not required and any errors are mine alone.
--------------------------
NORTHERN ALLIANCE FORCES


MG Krox: 10d, abysmal sequence deck


BG O'Dell: 12d+1

- Sneeches Seminary Regiment: 8d/4d, Raw

- McElliot's Kreikorps: 10d/4d, Rabble

- Hartuh Mawtch Musketeer Regiment: 10d/6d, Regular

- Poozer Pioneers: 10d/8d, Crack

- Hippo-Heimer Fusiliers: 10d/6d, Regular

- 6th Light Field Battery (6lb): 8d/6d, Regular


BG Van Nuys: 8d

- Vavoode Voltiguers: 10d/6d, Regular

- Hippo-Heimer Musketeers: 10d/6d, Regular

- Boober Bay Uhlans: 8d/6d, regular (poor roll on these guys!)

- Hippo-Heimer Dragoons: 12d+1/6d, Regular


Morale Points: 10 (ended with 3)


COALITION FORCES

Marshal Verdun: 12d+1, average sequence deck (this 12+1 would enable them to

survive several morale rolls)


Commander Frist: 10d

- 1st Legion: 10d/4d, Raw

- 2nd Legion: 10d/4d, Raw

- 3rd Legion: 10d/4d, Raw

- 4th Legion: 8d/4d, Raw

- Foot Battery (6lb): 10d/6d, Regular


General De Juer: 10d

- Finnegan Foresters: 8d/6d, Regular

- Hurst Highlanders: 12d/6d, Regular

- Lincoln Light Infantry: 10d/6d, Regular


General La Blanc: 8d

- Britannia Infantry: 8d/4d, Raw

- Luddite Light Infantry: 10d/4d, Raw

- Ribal Dragoons: 8d/6d, Regular

- Grover Dragoons: 12d/6d, Regular


Morale Points: 12 (<0 at end)


TURN 1


INITIATIVE 1

- 13 vs 10: <3 (the 1st # will be the Coalition, 2nd is the Alliance; <>

symbols indicate who goes 1st


C3

-Move: general advance by all units

-Infantry Fire: none

-Lull: < (this means they kept the initiative)


A3

-Tactical Advantage

-Leadership: 1st draw indicated a message was sent to the camp (Van Nuys'

Brigade)

-Lull: < (indicates the initiate switched to the Coalition)

-C, Maneuver: adjust attack columns


INITIATIVE 2

- 13 vs 5: <8 (I think I should have only made this a 12...have to check the

rules)


C8

-Manouver:

-Tactical Advantage:

-Movement: cavalry move to the 2nd bridge and prepare to charge

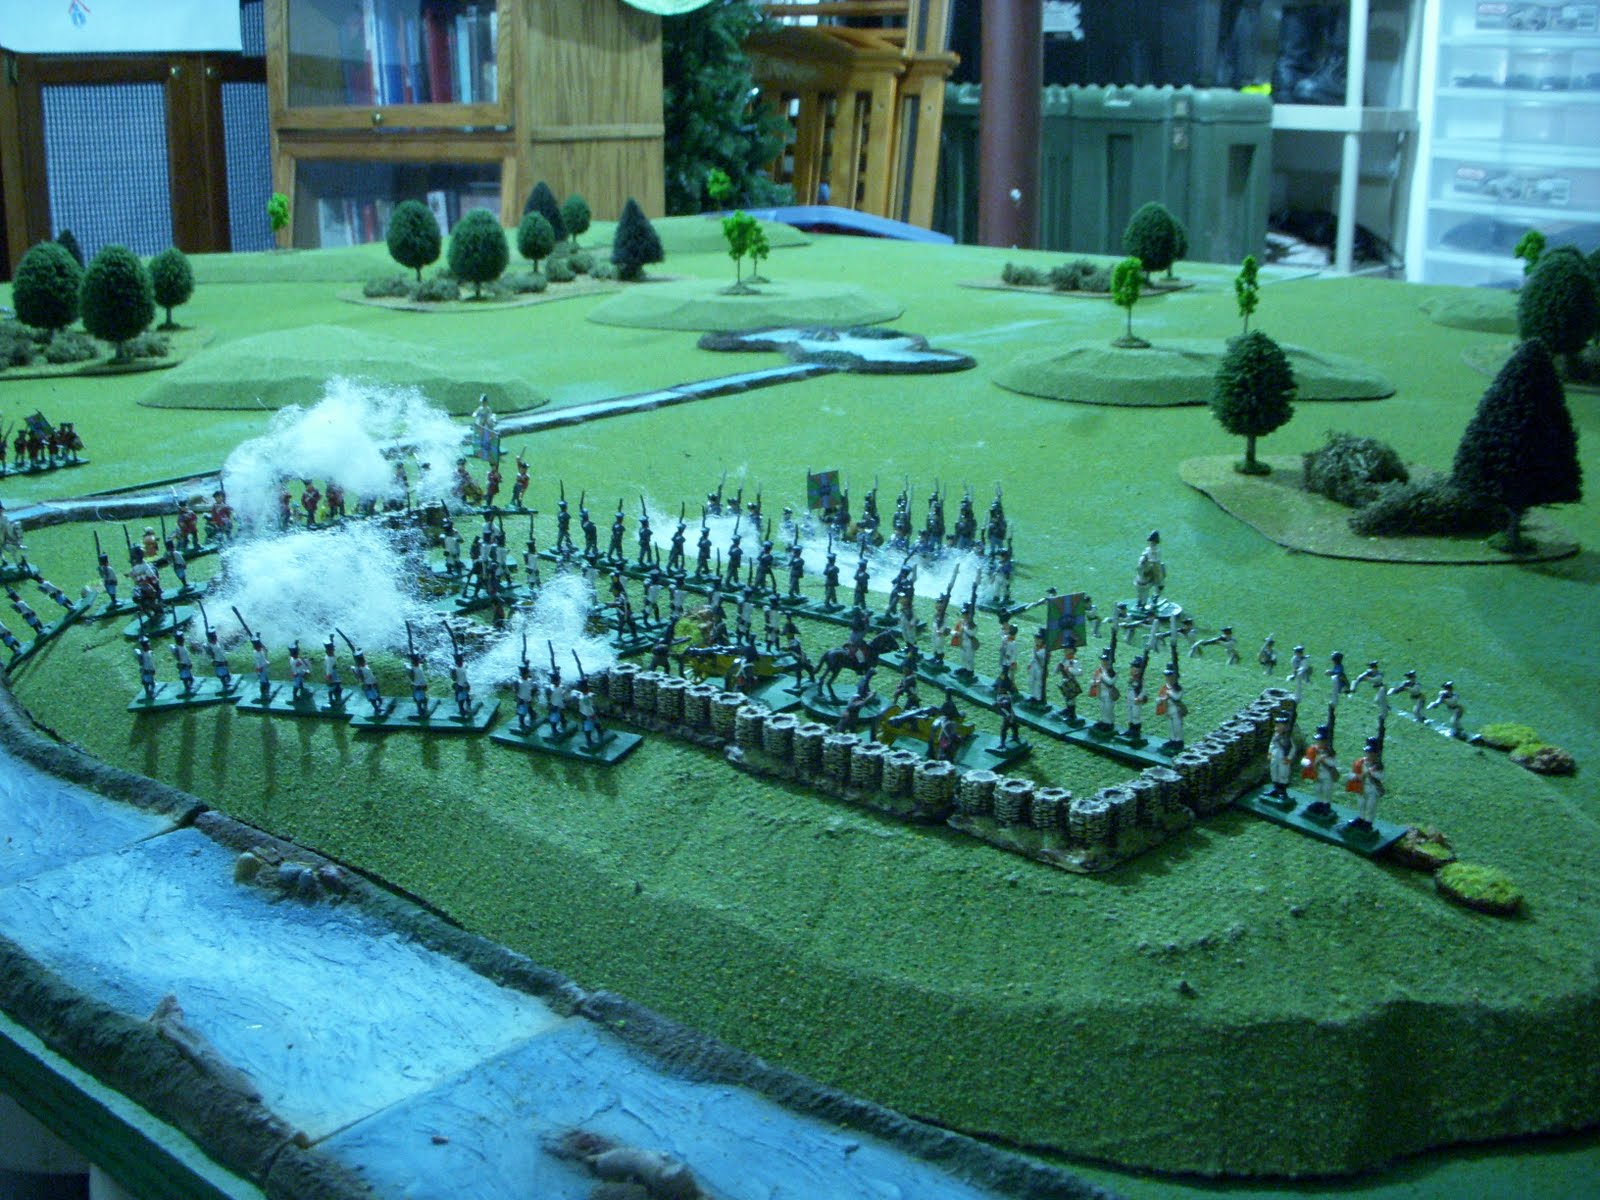
-----FIRE: Sneeches fire on advancing Highlanders...6d v 12d: 6 vs 3, no

effect!

--- Might be trouble defending the redoubt

-----FIRE: McElliot fire on 3rd Legion as they storm the hill...4d v 12+1: 3 v

12, 3 UI lost and rout

--- Great volley by this undisciplined unit

-Artillery Fire: none

-Melee: 2 battalions melee McElliot Freikorp (one forced to retreat by fire)

on the hill, 12+1 v 12 = 8 v 2; 2 UI lost and route!

-Leadership: rally 1 UI from 3rd Legion

-Army Morale: none

-Lull: <

-Infantry Fire: they advance without firing

--- Just realized I pulled 9 cards! Fog of War!


A8

-Lull: <

-C, Army Morale

-Tactical Advantage

-Lull: >

-Infantry Fire: see the results above...used this card to "reload"

-Maneuver:

-Lull: <

-C, Move (odd die roll so the cavalry could not use this to charge across the

bridge...key event in that area

-Artillery Fire: Battery fires on advancing 1st Legion, 4dv12+1: 4v11, 2

UIlost; this would allow McElliot to escape

---Only pulled 7 cards...must have pulled one from the other deck above!


INITIATIVE 3

- 9 vs 1 = <8


C8

-Army Morale

-Leadership

-Infantry Fire: still advancing with the bayonet

-Melee

-Tactical Advantage

-Artillery Reload: the battery is not set yet

-Leadership: rally 1st Legion and bring 3rd Legion back in command

-Move 1 Command: center brigade moves to surround Sneeches at the redoubt

-Lull: >

-A, not sure what I pulled???

---Looks like I miss-counted again!


A8

-Melee

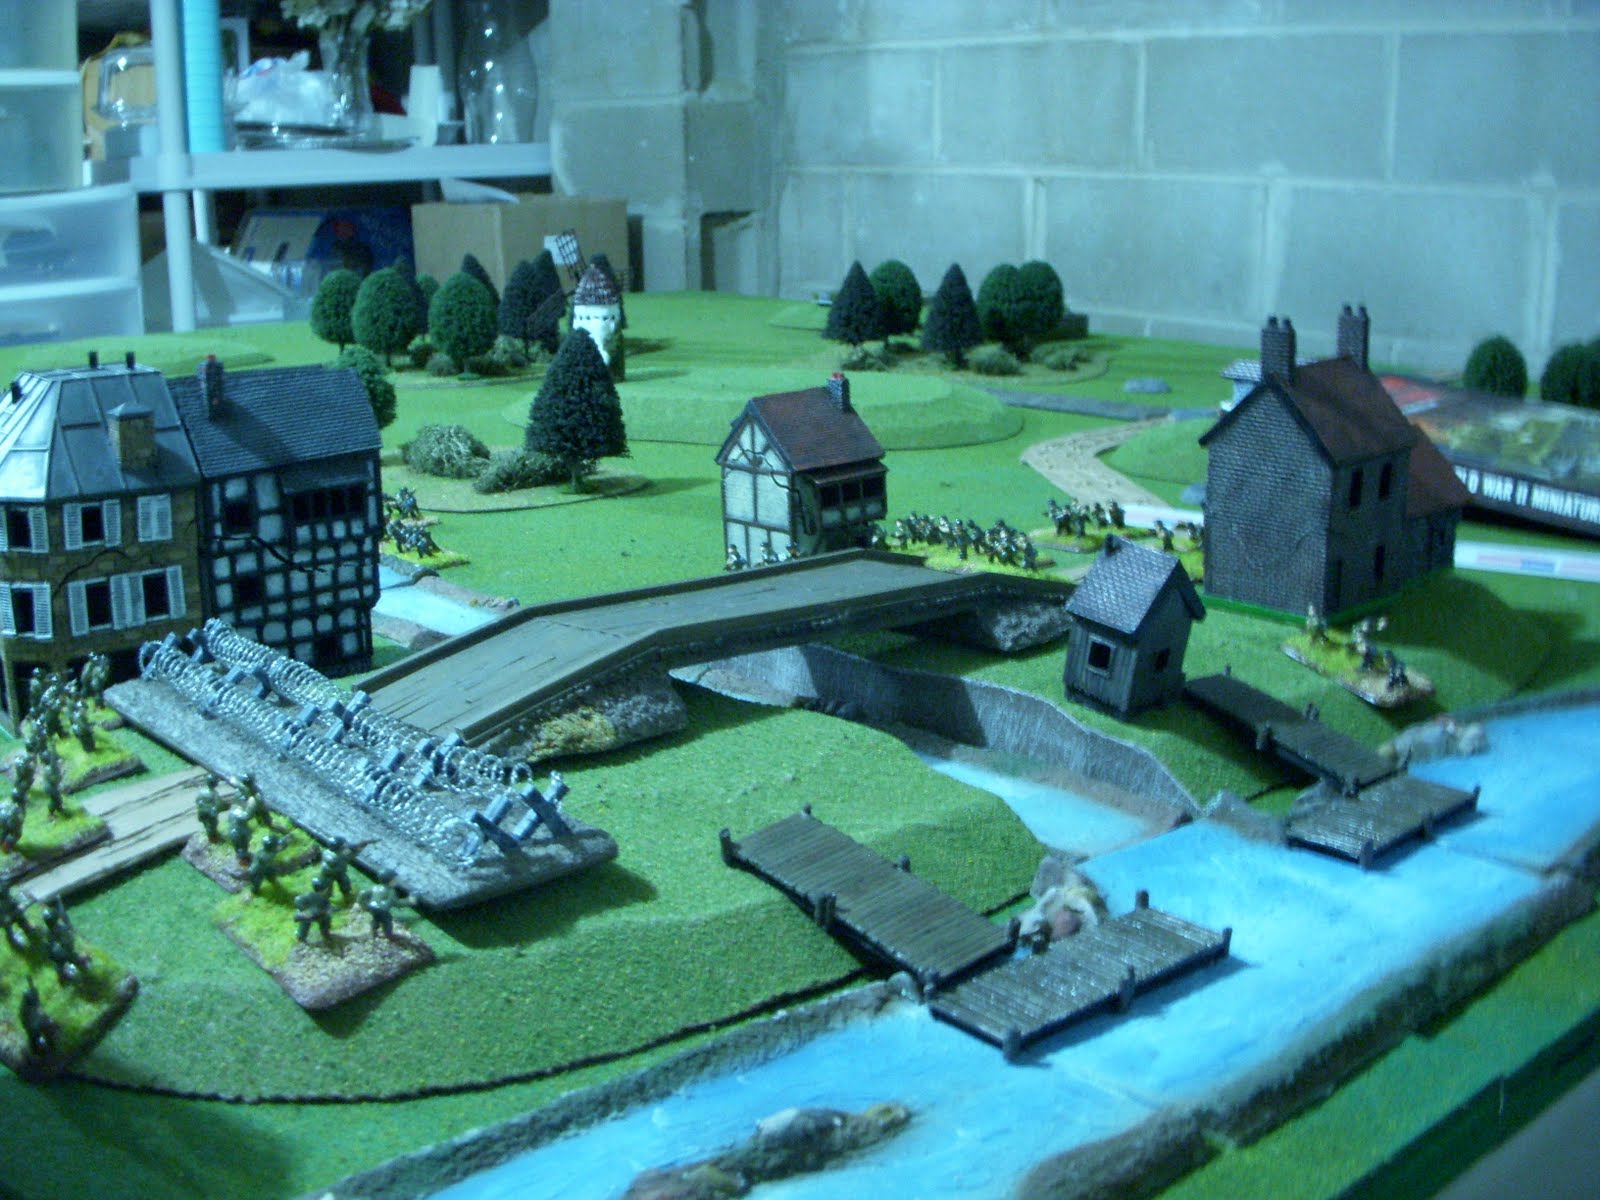
-Move 1 Command: BG O'Dell orders the Sneeches Seminary Regiment to retreat

from the redoubt while McElliot's Regiment flee through the town and over the

bridge

---FIRE: Hippor-Heimer troops advance from the town and fire a volley at 4th

Legion; 4 v 12+2: 3 v 8; 1 UI and fall back

-Army Morale:

-Move:

-Lull: <

-C, Melee

-Move: Poozer Pioneers cross to the West back and deploy in line to protect

the Southern flank by the flooded ground

-Leadership: 2nd card...message arrives ordering Van Nuys to break camp and

defend the canal bridge


INITIATIVE 4

-4 v 10: >6


A6

-Artillery Fire: fire on the Legions advancing over the hill

-Artillery Fire: blast them again

-Infantry Fire: defenders reload and prepare for the onslaught

-Melee

-Lull:>

-Infantry Fire:


C6

-Lull:<

-Artillery Fire

-----------------------Last card in the deck, end of turn


TURN 2


INITIATIVE 1

- rolls gave 3 to Coalition


C3

-Leadership

-Movement: Dragoons charge Vavoode Regiment at the bridge---Vavoode fire but

no effect and are then forced back 2"

-Tactical Advantage


A3

-Movement: BG Van Nuys' troops rush to the bridge with the Uhlans in the lead

-Lull: >

-Movement: Vavoode fall back to allow Boober Bay Uhlans to change (used a Tac

Adv card) the enemy Dragoons

---Melee: 8d v 10d, 1 v 10= 3 UI lost, Dragoons lose their colors to the

Uhlans and their army drops to 0 Morale Points; BG Van Nuys falls during the

fight and is carried from the field [rolled a 1 on d12 on my next Army Morale

card]


INITIATIVE 2

- 6 vs 10: >4


A4

-Infantry Fire: Hippo-Heimer troops force the attacking 4th Legion to fall

back again along the river bank

-Melee

-Leadership

-Lull: <

-C, Move 1 Command: 2nd Dragoon Regiment counter-attack the Uhlans to try to

gain the bridge; Uhlans route them back across [they route out of range and

are done for the battle; Boober Bay Uhlans have broken two cavalry regiments!]


C4

-Artillery Fire

-Infantry Fire

-Leadership

-Army Morale: with units routing and at 0 Morale Points, they must test: 12 vs

2...pass easily...good commander!


INITIATIVE 3

- 9 v 4 = <5


C5

-Lull: >

-A, Artillery Fire

-Move: Legion battalions overrun the artillery defending the town but suffer fire from Poozer Pioneers. 4th Legion forces Hippo-Heimer Fusiliers to fall back to the town.

-Lull: <

-Artillery Fire:

-Lull: <


A5

-Leadership: O'Dell lets McElliot's troops continue to route and he heads back to the battle line.

-Army Morale: this is when I rolled the 1 on 12d to lose Van Nuys.

-Maneuver

-Army Morale

-Artillery Fire: nothing to fire after losing the guns!


INITIATIVE 4

-11 vs 10 = <1


C1

-Infantry Fire


A1

-Artillery Fire


INITIATIVE 5

-8 vs 3 = <5


C5

-Move

-Leadership

-Infantry Fire

-Maneuver

-Melee: 4th Legion routs the Hippo-Heimer Fusiliers; the town is in jeopardy


A5

- Hartuh Mawtch Musketeer Regiment fires and routes #2nd Legion to recapture the guns

-Lull: <

-C, Melee

-Lull: <

-C, Artillery Fire

-Melee

-Army Morale

-Move


INITIATIVE 6

- 12 vs 9 = <3


C3

-Army Morale : 9 vs 6...no effect

-Melee

-Maneuver


A3

-Tactical Advantage

-Infantry Fire

-Move 1 Command

------------------------------

TURN 3


INITIATIVE 1

-3 vs 8= >5


A5

-Lull: >

-Lull: >

-Lull: <

-C, Army Morale: 11 vs 7, still hanging on!

-Infantry Fire: Hartuh Mawtch Musketeer Regiment and Poozer Pioneers destroy 2nd Legion!

-Artillery Fire


C5

-Leadership

-Tactical Advantage

-Movement: 4th Legion continues to storm the town and forces Sneeches back.

-Tactical Advantage

-Army Morale: 11 vs 11!


INITIATIVE 2

-6 vs 3 = <3


C3

-Artillery Fire

-Melee

-Leadership


A3

-Lull:>

-Army Morle

-Movement: Sneeches charge and route 4th Legion to re-secure the defense line


INITIATIVE 3

- 11 - 7 = <4


C4

-Maneuver

-Melee

-Melee

-Move 1 Command


A4

-Infantry Fire

-Tactical Advantage

-Tactical Advantage

-Move: Hartuh Mawtch Musketeer Regiment advances and fires; General De Jeur is killed stopping the last major Coalition attack


INITIATIVE 4

-11 - 6 = <5


C5

-Army Morale: 1st brigade (Legion troops) breaks and begins to fall back after having come so close to taking the town. Heavy losses combined with the inexperience of the troops is too much.

-Lull: >

-A, Melee

-Move: 3rd Brigade falls back to cover the flank

-Infantry Fire

-Move


A5

-Lull: >

-Artillery Fire

-Lull: >

-Melee:

-Army Morale


INITIATIVE 5

-10 - 5 = <5


C5

-Army Morale

-Leadership

-Lull: >

-A, Move

-Lull: >

-A, Move

-Lull: <


A5

-Army Morale: Van Nuys' command is still leaderless and unable to exploit success

-Maneuver

-Infantry Fire

-Melee

-Leadership: Colonel Von Grouchy from the Hippo-Heimer Dragoons takes command of the 2nd brigade


INITIATIVE 6

- 5 - 4 = <1


C1

-Artillery Fire


A1

-No action ---- Coalition forces withdraw in good order without pursuit

Wednesday, April 6, 2011

Battle of Merlichetic

I used the Piquet: Field of Battle rules for the game. I started by randomly assigning the leadership values. This gave a significant advantage to the Coalition forces as they had a 12+1 leader and an Average sequence deck vs the Katzian 10 leader with an abysmal deck. Additionally, several unit characterization roles went against the Katzians. (more on this in the next post)

The Order of Battle:
NORTHERN ALLIANCE FORCES


MG Krox: 10d, abysmal sequence deck

BG O'Dell: 12d+1

- Sneeches Seminary Regiment: 8d/4d, Raw

- McElliot's Kreikorps: 10d/4d, Rabble

- Hartuh Mawtch Musketeer Regiment: 10d/6d, Regular

- Poozer Pioneers: 10d/8d, Crack

- Hippo-Heimer Fusiliers: 10d/6d, Regular

- 6th Light Field Battery (6lb): 8d/6d, Regular

BG Van Nuys: 8d

- Vavoode Voltiguers: 10d/6d, Regular

- Hippo-Heimer Musketeers: 10d/6d, Regular

- Boober Bay Uhlans: 8d/6d, regular (poor roll on these guys!)

- Hippo-Heimer Dragoons: 12d+1/6d, Regular

Morale Points: 10 (ended with 3)


COALITION FORCES

Marshal Verdun: 12d+1, average sequence deck (this 12+1 would enable them to  survive several morale rolls)

Commander Frist: 10d

- 1st Legion: 10d/4d, Raw

- 2nd Legion: 10d/4d, Raw

- 3rd Legion: 10d/4d, Raw

- 4th Legion: 8d/4d, Raw

- Foot Battery (6lb): 10d/6d, Regular

General De Juer: 10d

- Finnegan Foresters: 8d/6d, Regular

- Hurst Highlanders: 12d/6d, Regular

- Lincoln Light Infantry: 10d/6d, Regular

General La Blanc: 8d

- Britannia Infantry: 8d/4d, Raw

- Luddite Light Infantry: 10d/4d, Raw

- Ribal Dragoons: 8d/6d, Regular

- Grover Dragoons: 12d/6d, Regular

Morale Points: 12 (<0 at end)


I used my new terrain markers for the game and the dry-erase board on the wall came in very handy.

This was a fun battle. The rules supported a narrative style and were great for solo play. Each side had a general plan and when in doubt, I refered back to the plan to make decisions.

I have a short summary below with pictures. I will also post the notes I kept for every card turned in a later post.
------------------------

3rd of October-
The dawn fog has just started to burn away when the columns of advancing infantry can be seen heading West out of the flooded lands around Merlichetic. The Alliance forces are set up to defend the town with the Sneeches Seminary Regiment occupying a redoubt on the windmill hill and McElliot's Friekorps defending a low hill just North of the East-West road. MG Krox has posted his battery of guns astride the road just on the outskirts of the town supported by the Hartuh Mawtch Musketeer Regiment. The Poozer Pioneers are on the far end of the town and the Hippo-Heimer Fusiliers are in local reserve.

Further South, the Vavode Voltigeur Regiment defend the bridge over the canal [the only crossing point in five miles other than the town]. The Boober Bay Uhlans, Hippo-Heimer Musketeers, and the H-H Murky Dragoons are encamped at the village of Grenoble to the West of the bridge.

The oncoming Coalition troops were grouped in three columns. The Northern most consisted of four battalions of rebel Hippo-Heimer infantry. They were headed straight for the defending Friekorps with three battalions attacking the hill while one moved along the river bank. The central column headed for the windmill hill as the second element of the attack on Merlichetic. The Southern force consisted of two battalions of infantry and two small cavalry regiments. This force headed for the bridge.

The Coalition forces succeded in taking the two hills quickly and began attacks on the main defenses after almost surrounding the Sneeches Regiment and causing McElliot's Freikorp to route. These undisciplined troops did manage to get off one good volley and defeat the firts attacking battalion.

The Coalition 2nd Brigade would fail to force their attack as they looked for passages through the flooded fields. This left the Legion Brigade to attack into the face of the defending troops reinforced by a battery of 6lb guns. Despite heavy losses, the Legion troops almost succeeded in taking the town; their morale gave out after two battalions reached the town but could not dislodge the last Katzian battalion. The failure of the 2nd brigade to support the Legion advance is sure to be a hot topic in the Coalition camp...somewhat molified by the death of General De Jeur reportedly by drowning in the flooded fields.

The Coalition atatck on the bridge began well with a rapid advance and the cavalry even made it across but were caught by a counter charge by the Boober Bay Uhlans. The Uhlans destroyed one regiment and routed another but suffred the loss of BG Van Nuys to a saber wound to the head. He is seriously injured and recovering at the nearby convent. The General's loss did sow confusion in the brigade and they missed a chance to pursure the enemy and turn a tactical victory into an operational route.

A new day sees The Kingdom of Katzenstein again at war. MG Krox's forces are reinforcing the defenses around Merlichetic with the help of some Hippo militia and the local townsmen. He has posted piquets on all approaches and send the Boober Bay Uhlans with the Vavoode Voltigeurs to observe the Coalition Camp.

At the Coalition Camp, Marshal Verdun is building his own fortifications centered on a small redoubt covering the ford. The Legion troops are reorganizing after suffering grevious losses, but morale is still high. The loss of his cavalry puts the Marshal in a foul mood and he is relying on spys to report on the goings on in Merlichetic.


The battlefield from the Alliance side


Troops camped nearby

Vavoode Voltigues defend the bridge

Sneeches Seminary Regiment defend the redoubt in front of the town

McElliot's Freikorps on the next hill

Dawn sees the enemy advancing from the woods

And the Legion advancing along the road and riverbank

The defenders fire with little effect

Sneeches did not wait for the whites of their eyes

McElliot's troops route


4th Legion attack along the riverbank; they would reach the town after being repules several times


Coalition cavalry prepare to charge


1st line is broken

McElliot's troops prove unralliable

The defenders pour on the musketry

Vavoode Voltigues fail to stop the charge with fire

And are pushed back but not broken

Saving time for reinforcements to arrive

Boober Bay Uhlans charge!

Destroying the enemy dragoons!

And routing the 2nd cavalry regiment; this stopped the enmy flank attack

Another Legion assualt

4th Legion routes the Hippo-Heimer infantry and almost take the town

Katzian troops advance and catch the 2nd Coalition brigade as it finaly clears the flooded field

The Sneeches Seminary Regiment prove their bayonets are sharp by routing the 4th Legion

The Legion retreats to fight another day

Covered by the remaining troops of the 2nd and 3rd brigades


Alliance forces reform the line

And defend the canal bridge


------